

Your home is a reflection of your personal style, and one of the best ways to showcase your taste and personality is through the artwork you choose to hang on your walls. Whether you've recently purchased some trendy wall art or want to refresh your space with existing pieces, arranging and hanging them correctly can make a significant impact. In this guide, we will walk you through the steps to arrange and hang your wall art, from selecting the right pieces to creating a stunning gallery wall. Let's turn your walls into a visual masterpiece
How to Arrange Wall Art
Preparing the Wall
Before you dive into hanging your art, you must prepare your wall to ensure a secure and visually appealing outcome. Proper preparation involves finding and marking studs, measuring and laying out your art, and potentially addressing wall imperfections.
Start by locating the wall studs. A stud finder is a handy tool for this task. If you don't have one, you can use the classic "knocking" technique by gently knocking on the wall and listening for the hollow sound between studs. Once you've found the studs, mark their positions with a pencil. This step is crucial to ensure that your artwork is securely anchored and won't fall unexpectedly.
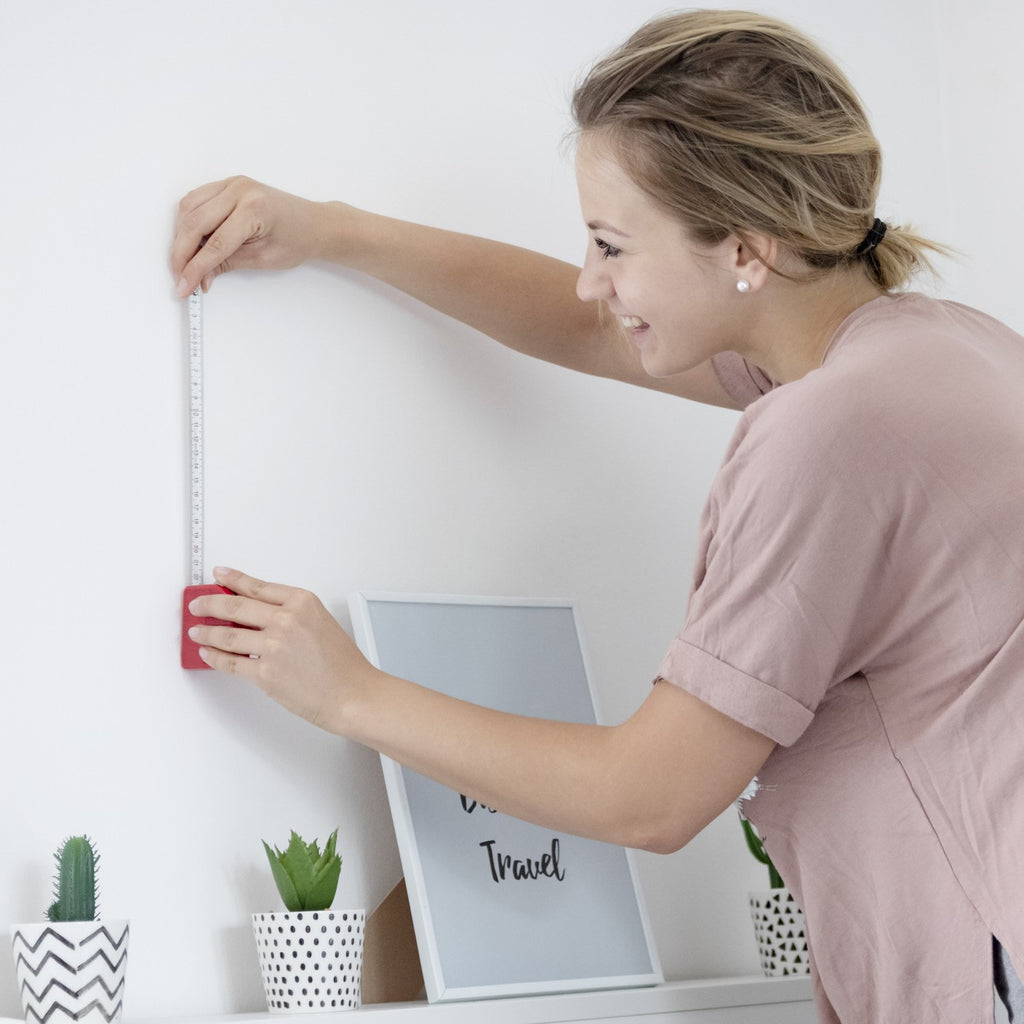
Measuring and Layout
Measuring and layout planning are vital to achieving a balanced and visually pleasing result. Measure the available wall space and the dimensions of your art pieces. Decide how much space you want your art to occupy, and consider the spacing between pieces to create a harmonious arrangement. The centering of your artwork relative to other elements in the room is also essential. Visual balance is crucial, so aim for an arrangement that feels centered and proportionate within the context of the room.
Framing and Matting
Framing and matting your artwork are not just about protection; they are a significant part of the aesthetics. Your choice of frames and mats can elevate or alter the overall impact of your art.
When selecting frames, consider the style of your artwork and the decor of the room. Frames should complement the art and enhance its beauty without overpowering it. For example, modern art often pairs well with sleek, minimalist frames, while vintage pieces may benefit from ornate, classic frames. Matting, if used, not only enhances the appearance but also serves a protective function by preventing the artwork from directly touching the glass.
The visual impact of your wall art arrangement is crucial for creating an inviting and cohesive atmosphere in your home. To maximize the impact, consider these aspects
Think about creating focal points. Larger or more eye-catching pieces can serve as central points of interest in the room. Placing these where they draw the most attention can make a bold statement and set the tone for the entire space.

Group similar styles or themes together. Grouping artwork with similar styles, colors, or themes can create a harmonious and cohesive look. This arrangement helps your art pieces visually communicate with each other, enhancing the overall ambiance of the room. Whether you have a collection of abstract paintings, black and white photography, or a set of vintage travel posters, grouping them strategically can be visually captivating.
On the other hand, you can purposefully mix styles and create a dynamic contrast. Combining different styles, such as placing abstract art next to a traditional portrait, can infuse energy and personality into the room. However, this approach requires a careful balance to avoid a cluttered or disjointed appearance. A careful selection and placement of contrasting pieces can add an element of surprise and uniqueness to your space.
Hang Artwork at Eye Level

Properly hanging artwork is crucial to ensure it's not too high or too low, but at a comfortable eye level. This level typically ranges from 57 to 60 inches above the floor. By hanging your art at this height, you create an optimal viewing experience, allowing it to be appreciated without straining the neck or causing discomfort.
Without a Level?
If you don't have a level on hand, don't worry; you can still hang your art straight. Various alternatives can help you achieve a level placement. Here are a few options:
- 1) Smartphone Apps: Numerous smartphone apps can turn your phone into a digital level. These apps use the phone's built-in sensors to measure angles accurately. They are a convenient and often free solution to ensure your artwork hangs perfectly straight.
- 2) DIY Leveling Techniques: If you prefer a more low-tech approach, you can use simple DIY leveling techniques. Here are two common methods:
- Measuring from the Ceiling: Start by measuring the distance from the ceiling to where you want your art to hang. Mark this point on the wall, then measure from the top of your frame to its hanging hardware. Subtract this measurement from the first one and mark this spot on the wall. This is where you'll place your hanger.
- Measuring from the Floor: Similar to the ceiling method, measure the distance from the floor to where you want your art to hang. Mark this point on the wall, then measure from the bottom of your frame to its hanging hardware. Subtract this measurement from the first one and mark this spot on the wall. This is where you'll place your hanger.
Both methods can help you ensure that your art is level without the need for a dedicated leveling tool.
Picture Placement on a Wall — Size Matters

The size of your artwork in relation to the wall and the surrounding space can significantly impact the visual appeal of the room. Consider the following size-related tips:
Oversized Art
If you want to make a bold statement, oversized art is an excellent choice. These large pieces can dominate a wall and create a commanding focal point in the room. Consider oversized art for spacious areas where you want to make a grand impression. It can also work well in rooms with high ceilings, as the art fills the vertical space and adds a sense of grandeur.
Small Art
Smaller pieces are perfect for creating a sense of intimacy in a space or adding visual interest to a room with limited wall space. Grouping smaller art pieces together can create a dynamic and visually engaging display. Smaller art can be used to fill gaps or alcoves, making use of every inch of available wall space.
Alternative Wall Hanging Ideas
While traditional single art pieces are a timeless choice, alternative wall hanging ideas can add depth and personality to your home's decor. One of the most creative and visually engaging approaches is to create a gallery wall. Here are different gallery wall styles you can consider:

Grid
The grid style arranges art pieces in a precise, orderly manner. This method creates a clean, modern look that works well in contemporary or minimalist interiors. To achieve a perfect grid, you can use a measuring tape or ruler to ensure even spacing between each piece. The result is a structured, cohesive display.
Salon-Style
The salon-style wall is characterized by its eclectic mix of art pieces. It's an artistic and somewhat spontaneous arrangement where artwork of different sizes, shapes, and styles are combined to create a visually captivating collage. To create a salon-style wall, you can start with a central focal point, then work outward, adding pieces that complement and contrast with each other. The key to success with salon-style is finding a balance between chaos and cohesion.
Asymmetrical
Asymmetrical gallery walls embrace the beauty of mismatched arrangements. This style allows for a more artistic and informal presentation of your art pieces. Asymmetry can be achieved by arranging art in a seemingly haphazard manner, creating an arrangement that flows organically. The result is a visually dynamic and unique display that can add an element of surprise and personality to your space.
More Tips for Arranging Wall Art
To ensure your wall art remains beautiful and well-preserved, it's essential to consider factors such as maintenance and care. Wall art can be sensitive to its environment, and taking steps to protect it is vital for its longevity.

Artwork can be affected by various environmental factors, so consider the following for the long-term care of your wall art:
- Protect from Sunlight: Direct sunlight can cause fading and deterioration of artwork. Be mindful of placing art in areas with excessive sun exposure, or use UV-protective glass if your art is exposed to sunlight. Alternatively, consider rotating your art periodically to ensure even wear.
- Monitor Humidity: Fluctuations in humidity can affect the condition of your art. Extremely dry conditions can lead to cracking or warping, while high humidity can cause mold and mildew. Maintain a stable humidity level in your home, and consider using dehumidifiers or humidifiers as needed to prevent damage to your art.
- Regular Cleaning: Dust can accumulate on the surface of your art, affecting its appearance. Dust your artwork gently with a soft, lint-free cloth or a soft brush regularly to keep it looking its best. Be cautious when cleaning framed art with glass to avoid scratching.
By following these maintenance and care guidelines, you can ensure that your wall art remains in excellent condition and continues to enhance the beauty of your home. Whether your art is a personal collection, an investment, or simply a cherished decorative element, proper care is essential to preserve its value and aesthetics.
How to Hang Wall Art Depending on Your Surface
Hanging wall art effectively often depends on the type of surface you're dealing with. The structural makeup of your walls, be it paneling, drywall, or even above a fireplace, can influence the tools and techniques you use to securely display your artwork. Here's a breakdown of how to hang wall art depending on the surface.
How to Hang Wall Art on Paneling
Paneling can add rustic charm and texture to your interior, but it also presents unique challenges when it comes to hanging wall art. Due to the irregular surface, traditional methods like using nails or standard picture hangers may not be sufficient. Here's how to effectively hang wall art on paneling:
Adhesive Hooks
One of the simplest and most non-invasive ways to hang pictures or art on paneling is to use adhesive hooks or strips. These are available in various weight capacities and are designed to stick securely to different surfaces. Make sure to clean the paneling surface thoroughly before attaching these hooks. They work well for lightweight art pieces.
Picture Molding Hooks
If your paneling has decorative molding or trim, you can utilize picture molding hooks. These hooks slide onto the molding, allowing you to hang artwork at the desired height without creating holes in the paneling itself.
Art Hanging Systems
Consider installing an art hanging system, which involves a track or rail attached to the wall. Art cables or wires are then hooked onto the track, providing a versatile solution for hanging and rearranging art pieces without damaging the paneling.
How to Hang Wall Art on Drywall
Drywall is the most common wall surface in homes, and it provides a relatively straightforward canvas for hanging art. However, you need to use the appropriate hardware and techniques to ensure a secure and damage-free installation.
Nails and Hooks
For lightweight to moderately heavy art, you can use nails, picture hangers, or D-ring hangers. Make sure to locate wall studs using a stud finder for added security, especially when dealing with heavier pieces.
Wall Anchors
When you don't have the option to hang art directly on a stud, anchors come to the rescue. A Wall anchor distributes the weight more evenly across the drywall, reducing the risk of damage. There are various types of wall anchors available, including toggle bolts, molly bolts, and plastic expansion anchors, each suited for different weight requirements.
Hanging Kits

Invest in hanging kits that include various types of hardware suitable for different art sizes and weights. These kits typically come with hooks, nails, anchors, and picture wire. This versatility makes it easier to find the right solution for your specific art piece.
Hanging Artwork Over a Mantelpiece or Fireplace
Hanging art above a fireplace can be a beautiful focal point, but it requires some specific considerations to ensure both safety and aesthetics.

Mantel Shelf
If you have a mantel shelf, consider resting your artwork on it rather than hanging it. This can create an elegant and stable display. Ensure the art piece is securely positioned, and use museum putty or non-permanent adhesive to prevent it from shifting.
Adjustable Mantel Brackets
There are special brackets designed to allow you to hang art over a mantelpiece while maintaining a safe distance from the heat. These brackets can be adjusted to suit your desired height and provide stability for your artwork.
Hearth-Safe Art
If you're placing art directly above a fireplace with an exposed hearth, choose hearth-safe artwork or materials. These are designed to withstand heat and won't be damaged by the fireplace's emissions.
Hanging Hardware for Wall Art
The hardware you choose for hanging art plays a crucial role in ensuring the stability and longevity of your installation. Here are some key considerations:
Safety Considerations
Ensuring the safety of your wall art installation is paramount, especially when dealing with heavy pieces or in areas prone to natural disasters like earthquakes. Safety measures to consider include:
Anchors for Heavy Art
For heavy art, use appropriate wall anchors or toggles designed to distribute the weight evenly. These anchors can be attached to the wall studs for maximum support. Be sure to follow the manufacturer's guidelines for weight limits and installation.
Earthquake-Resistant Hanging Options
In earthquake-prone regions, consider using earthquake-resistant hangers or museum-quality hanging systems that can minimize the risk of art falling during seismic activity.
Hangers and Nails
Selecting the right hangers and nails for your wall art is essential to prevent damage and ensure stability. The choice of hangers and nails depends on the weight and size of the artwork:
D-Ring Hangers
D-ring hangers are suitable for medium to heavy art pieces and offer a stable connection point for hanging wire or cord.
Sawtooth Hangers
Sawtooth hangers are ideal for smaller, lighter art. They are easy to install and provide a secure hanging point.
Hanging Wire
Use a strong, braided hanging wire to hang your art. Ensure that the wire is securely attached to D-rings or sawtooth hangers on the back of the artwork.
Nail Types
Choose appropriate nails for your wall type. For drywall, use picture hangers or wall anchors. When attaching to wall studs, use picture nails or screws for added stability.
Hanging Kits
Hanging kits are convenient solutions that simplify the process of hanging art. These kits typically contain a variety of hardware options to accommodate different art sizes and weights. They can be especially useful for those who frequently rearrange their art or are unsure about the best hardware for a specific piece. Hanging kits often include hooks, nails, wall anchors, and picture wire, providing a versatile assortment of tools for your hanging needs.
By considering your wall surface, using the appropriate hardware, and following safety measures, you can confidently hang your wall art, creating a visually pleasing and secure display in your home. Whether it's on paneling, drywall, or above a fireplace, the right techniques and hardware will ensure your art remains a beautiful and safe addition to your living space.